 African violets are a great “gateway drug” into flowering houseplants. There’s no shortage of different colors and flower forms available. Did you know you can create more plants for yourself with a single leaf? And these new plants may or may not look like the original? Read how below!
This post contains affiliate links for your convenience. I only promote products I love.
I have vivid memories of my mom and African violets. She’s really a sort of “violet whisperer”– she’s had plants that I swear were in flower 365 days a year. Got an African violet that won’t flower? Give it to my mom and she’ll have it blooming in no time!
I guess I didn’t inherit my mom’s magic touch with African violets. I’ve killed more than a few in my life– mostly from plain old neglect, but occasionally mealybug infestations have been to blame.
But I’m not without an African violet super-power– one of my favorite projects is to propagate them and make more plants using leaf cuttings. Because who doesn’t want more plants?
In all honesty some of my African violet propagating talents were honed by some of my spectacular failures in keeping the original plant alive. Sometimes all I could do to salvage anything was to take leaf cuttings and start over!
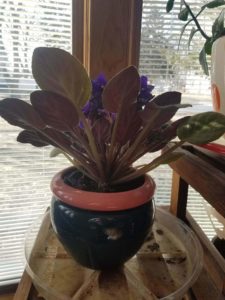
My background is in plant genetics and breeding. So for those of you that share my plant geek tendencies, you will be thrilled to know that African violets for whatever reason, have a relatively high rate of mutation in their leaves. So there is a good chance that the flower on the plant you propagated will look different than the parent plant.
This is especially true for African violets with multi-colored flowers, whether they’re spotted, splotched or something in between. Flower color can vary over time even on the same plant in these cases.
So how do I do it?
Supply List:
Rooting Hormones:
For years I used rooting hormone powder. It’s one of those tried-and-true products
My favorite resource book:
Leaves
Choose a healthy unblemished leaf. If you don’t have many leaves to pick from, you can get by with a leaf that’s not perfect, but the petiole, or “stem” of the leaf should be unblemished, firm and green. Pass up any leaf with a brown squishy petiole, or spots on the leaf that you can’t remove.
With a little luck you can remove an entire leaf with an angled tug. To be perfectly honest, I’m not very good at this. I usually resort to using a paring knife or razor blade. Make sure you disinfect with rubbing alcohol ideally between cuts, but at least between plants.
Rooting hormone
In time African violet leaf cuttings should produce a new plant, but using rooting hormone will speed things along considerably faster.
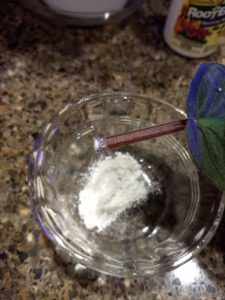
I used a paring knife to remove this African violet leaf from the mother plant. I put a small amount of rooting powder into a small bowl to avoid contaminating all of my rooting powder with moisture.
The typical rooting hormone formulation is a white powder that comes in a small jar. It’s mostly inert powder, plus a tiny amount of plant hormone that will tell the leaf cells to start growing as root cells.
Other rooting hormones come as a liquid or gel.
To use rooting hormone, put a small amount on a plate or other container. Never dip plant cuttings directly into the jar! Moisture will ruin the contents. Rooting hormone is good for years if you keep it cool and dry. Plus if your cuttings happen to harbor disease, you are potentially spreading all of that mess around to future cuttings.
Dip the cut end of each leaf in the rooting hormone, paying most attention to the cut end. Tap the leaf to get rid of any excess powder.
Moist Planting Mix
You don’t need a large deep pot of soil for your leaf cuttings– actually you’ll have better luck managing a shallower container.
The thing to remember is the cuttings need constant moisture, but not too much. If they are too moist they will rot. Using commercial seed starting mix or even straight vermiculite are the best options for African violet cuttings. If you use regular potting mix, keep a close eye out for excess moisture.
Moisten whatever mix you’re using before you start. The moisture level should be similar to a wrung out washcloth. If your mix is super-dry to start with, it may work better to fill your pots, set them in a bowl or saucer, water them in, and let them sit for an hour or more to let the mix absorb the water before using. Empty any excess water remaining in the bowl of saucer and let the pots drain while you get the cuttings ready.
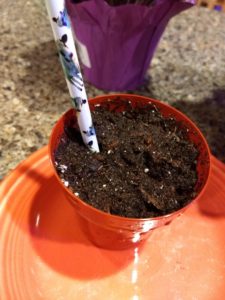
I used a pencil to make a hole for my leaf cutting. You only need to insert an inch or so of the leaf petiole in the planting mix.
Use a chop stick or pencil to make a small hole in moistened planting mix. This way you’re not removing the rooting hormone from the leaf cutting by inserting it in the mix. Carefully place the cutting into the hole, and gently push the soil in place around the cutting. You only need to insert about an inch of the leaf petiole into the hole. Covering more can lead to rot.
Depending on the container you’re using, you can anywhere from one to several cuttings per container. Leave a couple of inches between leaf cuttings. New plantlets will emerge at the point where the petiole meets the planting mix– so make sure you can see this point!
Keeping the cuttings from drying out is critical. Seal up the pot and cuttings in a plastic zip-top bag or another container that lets light in. The cuttings should get some bright light, but stay away from direct sunlight, which will cook your cuttings.
You can test whether your cuttings are “working” by giving a gentle tug after a couple of weeks. Cuttings that have some resistance are rooting in. In a few more weeks you should see tiny leaves of the new plantlet at soil level.
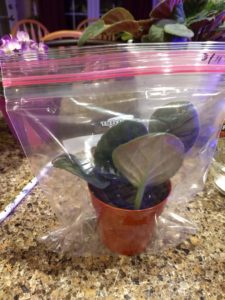
I put four leaf cuttings in this three-inch pot, sealed it in a zip-top bag and put it under my LED plant light.
Move plantlets to their own pot after they have at least 4 quarter-sized leaves. They will be more forgiving if you let them get fairly big before transplanting. Use good judgement if you have packed your cuttings in close though; you don’t want the plantlets so big you risk breaking them while untangling them from their neighbors. You may need to move them a little earlier to avoid too much entanglement.
**Bonus**
Do you have an overgrown African violet with a bare “neck”? This same procedure for taking leaf cuttings will work for essentially treating the entire plant from the bare “neck” up as a leaf cutting.
My sister Deb cut this overgrown African violet off at the base, and stuck a couple inches of the bare “neck” straight into potting mix, no rooting hormone. She sealed the plant up in a clear bag for about a month and it rooted in perfectly by then.
It does take a healthy dose of courage, but you make a clean cut across the “neck”, dip that cut end in rooting hormone (optional), and pot it up just like a leaf cutting. In a month or so, it should form new roots.
Leave the stump of the original plant in it’s pot, keep the soil slightly moist and you should eventually see plantlets form around the base. You can let the plantlets grow as is, or separate them from the parent plant once they have roots.
If you liked this post, please subscribe to Grounded and Growing today and receive your copy of “15 Tips to Become a '15 Minute Gardener'” so you can spend less time working ON your garden and more time enjoying being IN your garden.! It’s absolutely free. When you join the Grounded and Growing community, you’ll finally take the garden off your “To-Do” list and allow yourself time to enjoy your garden and savor the peace and serenity there. I tell subscribers about new posts as soon as I hit ‘publish’ and send weekly-ish updates on what’s going on in my garden– good, bad AND ugly.
All Rights Reserved. © 2019 Jennifer Schultz Nelson.
What a wonderfully written article, thank you! I’ve just put a whole bunch of leaf cuttings into soil and I’m so excited to see how they’ll come up.
Thank you so much!! I haven’t put any new posts up recently, but I am doing live feeds on Facebook periodically at: http://www.facebook.com/groundedandgrowing . Hopefully I can get my mojo back for writing some new posts despite the pandemic and being home with small children 24/7.
Thank you so much!
I have had African Violets my whole life and have never propagated them before. I’m excited to see the results!!
You’re welcome!! Send me pictures!! Jen@groundedandgrowing.com