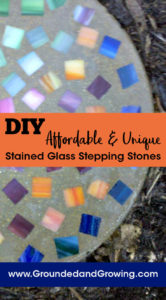
 Stained glass, concrete and creativity come together to make one-of-a-kind stepping stones for your garden.
This post contains affiliate links.
Shortly after we bought our house years ago, I wanted to make stepping stones for our new gardens; for me all the little decorative touches in a garden help it feel like home– much like indoors.
I looked at a couple of kits and was shell-shocked by the prices. For a plastic mold, and enough concrete and decorative stones or glass for one stepping stone, the price was $15 on up. At that rate I would need a small fortune to make enough stepping stones for all the places I wanted to use them!
As luck would have it, there was a workshop at the annual Master Gardener Conference that year for stained glass stepping stones. Of course I signed up– with two goals in mind 1) teach my own workshop on making stepping stones and 2) make a bunch of stepping stones for my own garden. I made two stepping stones at the workshop, which have held up for 10+ years in my garden without cracking!
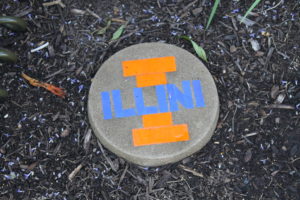
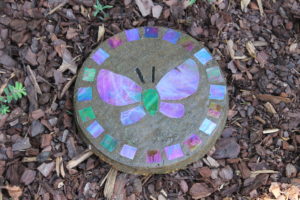
These stones are made with pieces of stained glass cut to make the designs. I considered doing the same for my own workshop, but using large pieces of stained glass were cost prohibitive. Instead I found small stained glass tiles that were much more affordable, which made for a very popular workshop each time I taught it.
If you want to create more than a couple of stepping stones, the supplies listed in the following instructions are more affordable than buying a kit.
- The original class I took used 9 inch cake pans as stepping stone molds. This was genius! You can find cake pans for about $2.50– much less than the $8 and up you’d pay for an official “stepping stone” mold. You could find even less expensive pans at garage sales or thrift stores too. I ended up buying a dozen new pans, plus I already had four random pans–so I could cast sixteen stepping stones at a time.
- Sure, I could have stuck with my four random pans, and just mixed multiple small batches of concrete. But it took a lot of pre-planning to do this project with two small children in tow. Once I had an window of time I needed to make as many stepping stones as I could!
- While researching tiles, most of what I found in stores were very small bags that cost a few dollars; it wasn’t cost effective to buy enough to make several stepping stones. My most affordable sources for tiles have been online. I’ve provided a link to one product, but both Amazon and eBay have tons of options. I spent about $50 on 5-6 pounds of stained glass tiles and it was more than enough for the 32 stepping stones I’ve made so far.
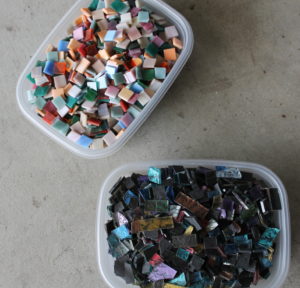
- Back when I was putting my initial workshop together, I came across some ceramic tiles on a clearance table that I wanted to use for stepping stones in my own garden someday. “Someday” only took over ten years to finally come around!
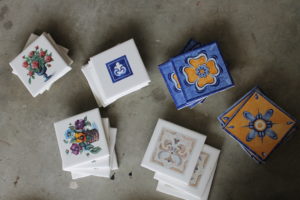
- Truth be told, I’m not completely sure these ceramic tiles will hold up as well as the stained glass does in a stepping stone. Ceramic pots tend to crack if they absorb moisture and they freeze. So my thinking is if you can keep the moisture out, you have a good chance of keeping the tiles intact.
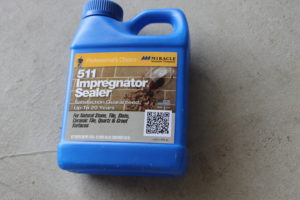
- I coated the unglazed backs and sides of each tile with a product for sealing unglazed tile, grout and stone a few days before using them in stepping stones. I’m keeping my fingers crossed that they will hold up over the winter. I guess I could always bring them indoors. But I doubt that will happen.
- The concrete is actually the cheapest component of this whole project. Enough concrete for 32 stepping stones only cost a little over $24. Compare that to “stepping stone mix” that costs around $7 and is only enough for one stone!
- You need to use two different types of concrete for this project: 1) sand or topping mix which has no large gravel pieces; it will flow in around the tiles, giving a smooth surface and 2) gravel or “ready-to-use” mix which contains larger gravel (aggregate) and provides strength to the stepping stone so you can actually step on it. I started out with one 60 pound bag of sand mix and one 80 pound bag of gravel or “ready-to-use” mix.
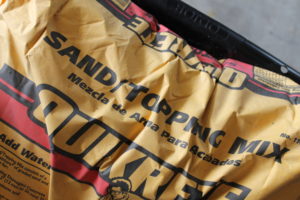
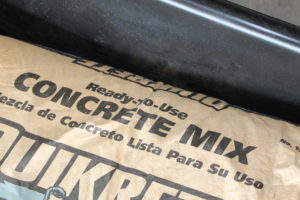
- In the end I used one and a half bags of sand mix, and an 80 pound bag plus three 10 pound bags of gravel mix (which my husband found mid-project. The 10 pound bags were so much easier to handle!) For future reference, the 10 pound bags of gravel mix are labeled exactly the same as the 80 pound bags, but for some reason they have only fine sand and no actual gravel for aggregate– I think you could probably use just this mix for the whole stepping stone, eliminating the need for buying two different concrete mixes.
- The final total cost per stepping stone was about $5.75— and that includes the pans which I can use for another round of stepping stones, should the mood strike.
Can kids do this project?
- Oh how I wish I could tell you doing this project with my 4-year-old and 1-year-old was domestic bliss! It tried my patience. I couldn’t even consider working on it unless my 1-year-old was asleep or in someone else’s care. My 4-year-old is at the age where he so desperately wants to help, whether he knows what he’s doing or not. He actually did really well as long as he was working beside me. It got a little dicey when we were mixing concrete– because he LOVES spraying the hose.
- Designing the stones was a fun activity to do together, and we spread it out over a few days. We had some neighborhood friends join us that are a little older (9 and 12-years-old) and they were engrossed in this project too. I would say kids from about 8-years-old and up could do at least the setup and design portion of this project with just a little parental guidance. Mixing the concrete is best left to someone at least high school age– and even then probably with a parent or someone who has mixed concrete before alongside just in case.
Supplies:
** Supplies listed in green are affiliate links for your shopping convenience.
- A metal or plastic form about 2 inches deep with a smooth bottom– I used these 9 inch cake pans.
- Mixing tub— a dish pan or hospital pan works well for smaller amounts
- Spade, hand trowel, or similar tool for mixing concrete. An ice scraper or children’s garden trowel works remarkably well for mixing small amounts
- Small concrete finishing trowel
- Rubber gloves— wet concrete is caustic and can burn your hands
- Dust mask— dry concrete mix is harmful to your lungs if breathed in
- Goggles— dry or wet concrete mix will harm your eyes
- Two kinds of concrete needed for this project: Sand or topping mix– a mixture of Portland cement and sand; plus Gravel or “ready-to-use” mix– a mixture of Portland cement, sand and gravel. Do not use quick setting concrete.
- Contact paper
- Concrete reinforcing fibers
- Petroleum Jelly
- Stained glass tiles or scraps; flat decorative tiles; broken ceramic pieces if they lay flat
- Band-aids (glass tiles can be sharp)
- *Optional* surface sealer for backs and edges of ceramic tiles (if using)
Directions:
1.) If you are using whole ceramic tiles or pieces, consider applying a sealer to any unglazed areas before using them in this project. The unglazed portions are porous and will absorb water. If the tiles are saturated and temperatures drop below freezing, there is potential for the tiles to crack.
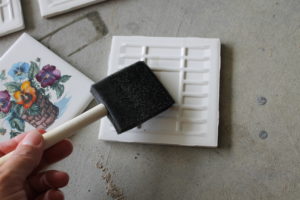
2.) Trace the pan you’re using onto contact paper and cut out. It should fit exactly into the bottom of your pan without touching or bunching up on the sides.
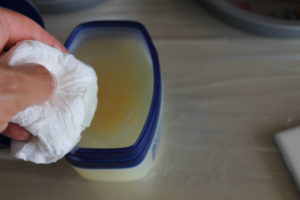
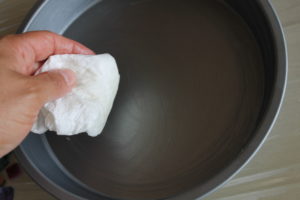
3.) Thoroughly coat the inside of your pan with petroleum jelly.
4. Create a design using your chosen tiles. You may wish to use a paper tracing of your form as a guide as to the size of your design, or you can design directly on the contact paper.
5. Place contact paper in the bottom of greased pan, sticky side up.
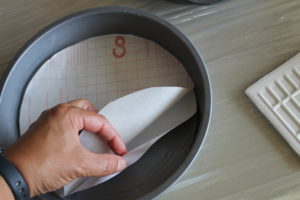
6.) Arrange your clean and dry tiles on the sticky side of the contact paper, leaving 1/4 inch around the edge of the contact paper. Be sure the right side of the glass is stuck to the paper! Also make sure that letters and numbers are written backwards and words are in reverse.
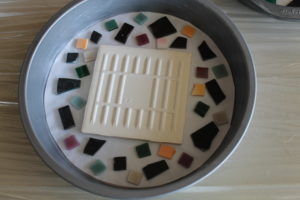
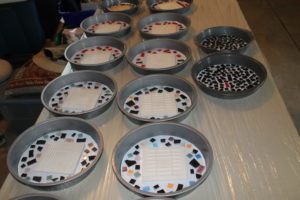
7.) Wear goggles, gloves, and a mask when mixing concrete (even though my dear husband is doing neither in this picture). Dust from dry concrete is dangerous if inhaled. Wet concrete is caustic and can burn your skin.
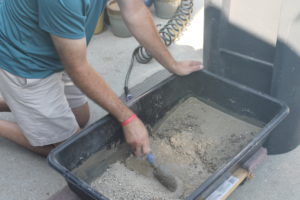
8.) Mix sand mix concrete with water; it should resemble creamy peanut butter in consistency. Add to the greased pan containing contact paper and tiles. Fill 1/3 to 1/2 of the pan. Use the finishing trowel to gently spread concrete, being careful not to disrupt tiles.
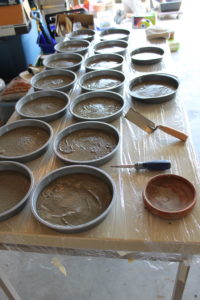
9.) Tap sides of the pan gently for a minute or so to release air bubbles. I tapped the pan with a screwdriver handle; don’t get carried away– you can dislodge the tiles from the contact paper and mess up your design!
10) Make a second batch of concrete with the gravel mix plus a generous pinch of reinforcing fibers. We mixed up two-thirds of an 80 pound bag of concrete and added in about 1/4 Cup of fibers. The fibers will distribute through the concrete as you mix. Add concrete to fill the pan to the top. Tap again for a minute to remove air bubbles. It’s normal to see water rising to the top.
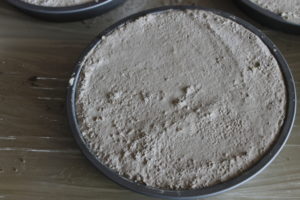
11.) Let concrete set up for 24 hours; gently remove stepping stone from form by turning upside down and pressing center of form. Peel off the contact paper. Gently scrub top of glass tiles with a damp rag to remove any residue. Use any small pointed tool or just your fingernail to clean excess concrete on tiles if needed. Then let stand for another 24 hours.
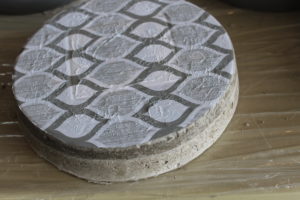
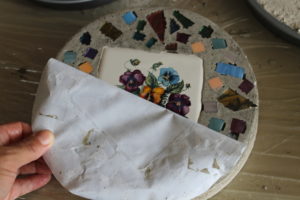
12.) Fill any air bubbles around the tiles by rubbing surface with a small amount of prepared sand mix concrete. Wipe off any excess. Let dry in a cool spot for a week and then enjoy in your garden. Let stone cure for one month before actually stepping on it.
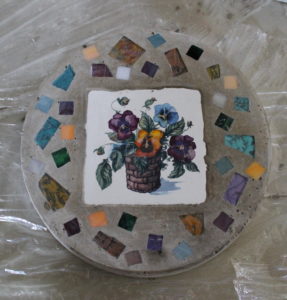
I probably didn’t need to make quite so many stepping stones for this project (32)– but my husband and I did talk about multiple places we need them. The trouble with giant 60 and 80 pound bags of concrete mix is they will harden when exposed to moisture. Even high humidity in your garage will harden an unopened bag over time. So I figured we needed to go big or go home unless I wanted to waste a bunch of concrete mix leaving it to harden in the garage.
My husband found the 10 pound concrete mix bags pretty late in the game, but in hindsight using these would have been an ideal way to chunk the project out into smaller batches. The flip side of this is I would have had more opportunity to procrastinate and put off finishing all the stepping stones. I had already put it off for ten years!
If you liked this post, please subscribe to Grounded and Growing today and receive your copy of “15 Tips to Become a '15 Minute Gardener'” so you can spend less time working ON your garden and more time enjoying being IN your garden.! It’s absolutely free. When you join the Grounded and Growing community, you’ll finally take the garden off your “To-Do” list and allow yourself time to enjoy your garden and savor the peace and serenity there. I tell subscribers about new posts as soon as I hit ‘publish’ and send weekly-ish updates on what’s going on in my garden– good, bad AND ugly.
All Rights Reserved. © 2017 Jennifer Schultz Nelson



Holy cow! Looking on Pinterest and I see this…this looks familiar. Golly gee it’s Jen! I got it saved on my gardening board! Then I go to Facebook and see it again! It was a good night on my IPad!
I’m so glad you found me Bobbi! I think you may see some more familiar things in the coming months, and a whole lot of new things. I finally have some time to spend in my own garden for a change so look out!
Please consider using cake pans from yard sale or $1 store & avoid using indoor tile, since it they do not weather well.
Great instructions, thank you! I’m wondering though, instead of doing it backwards on the bottom with contact paper, why couldn’t you just fill up the pan with concrete, level it off, then press your design pieces into the top? Seems like it would be simpler…?
I thought so too, the first time I was in a workshop that taught this method. When you add things to the top of the design, they tend to sink. It’s a fine line for the concrete to be set up enough for the pieces to not sink, or set too much so that they don’t adhere well. By setting everything on the contact paper, the finished product has a surface that is smoother than you will ever get trying to put the individual pieces on top. And by having them stuck to the contact paper, they don’t float up into the concrete (which could happen as you are trying to get the bubbles out, if you didn’t have the pieces adhered to the contact paper).
What kind of fibers do you mis into concrete?
Here’s an affiliate Amazon link to the type of fibers I used.(I get a small commission from sales via this link)
https://amzn.to/42QKQD9
Great lesson! I really appreciate the tip about the contact paper, I would never had thought of that. Thank you;)
Btw check freebies for leftover tiles from projects for future projects. I will be using the ones I got for your project.
Thank you!!
Dear Jen
This has to be the most laid back yet concise and easy to follow instructions I’ve ever read. Thank you.
Now to just do it🤦♀️ Ten years? 😊 Maybe sooner🙃🙃
LOL thank you! I can relate to the 10 year comment!!
My house sits on a 1/2 acre lot- with no sidewalk at all. Both the front and backyard are sloped and uneven.
I live in western NY where the soil is soggy from snow melt or the7 autumn rain. I would like a path from the street or lawn to the house to avoid soaking or mud clogged shoes dragging mud into the house.
I walk with a cane and and wonder how slippery the surface of the walkway may be.?
Looking at this group of issues, do you have any advice?
Thank You!
C. Tyler
You’re going to need some way to direct excess water away from whatever walkway ypu install, so some sort of gravel or sand bed would likely be the base. I would consult with a local landscaper/hardscaper that could shoe you the best options for your location.
Where do you find concrete fiber?
Do you think you could seal a photo somehow and place it in the center of the stepping stone. I’m a teacher and I think this would be a great end of the year gift!
I think you could seal a photo, into a stepping stone but I would first coat the photo in epoxy resin that’s rated for outdoors, look for ones labeled “marine” or “boat”.
I made several stepping stones back in the 80’s
Sold mist of them but mine gave been outside since then. I did put some wire mesh in between the cement. Yours turned out beautuful.
Marjie Krutsch
The Glass Canvas
Mkrutsch1@gmail.com
Thank you!!
Love this idea so I wanted to share mine. I take a medium size pizza box, cut the lid off, reinforce the corners with duct tape, put some cooking oil on a paper towel and oil it good, mix up my cement and fill them. Then every year since my child was two, I have him put one handprint and one footprint in the cement. Then I will add three cents or four cents or one nickel and two pennies, depending on his age in the bottom with his name. Sometimes I’ll add a few colored tiles around the edges if I have them. Usually more like a marble. I have had these tiles for years, my son is now 32 and they always put a smile on my face. When I move, I will definitely take them with me! It’s so easy and I can throw my box away. I just went to the Pizza Hut and asked for how many boxes I needed because I did these for friends for Mother’s Day who had kids my son’s age
I love this idea!!
My question is do you have to let the topping sand mix dry/cure before adding the cement mix when making stepping stones.
No, do not let the sand mix cure. You need it to adhere to the cement mix and it won’t if its already cured.
Where do you find fiber or what can you use for stepping st6ine.
I bought the fiber from a concrete company, but here is my affiliate link for the same thing on Amazon (I do get a small commission from sales via this link) https://amzn.to/42QKQD9